

How to Tape plasterboard Joins
| BACK TO TIPS MENU | |
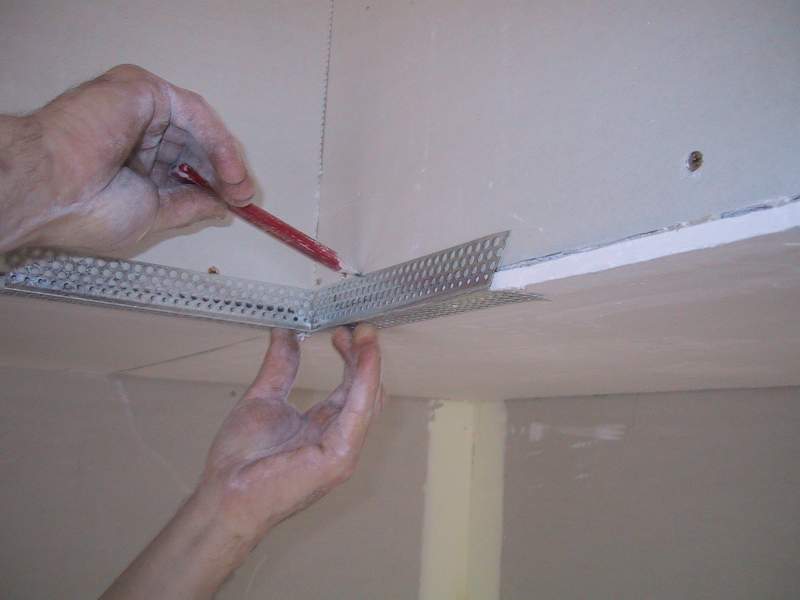
Self adhesive fibre glass tape (easy tape)NOTE: Easy tape should not be used on plasterboard ceilings, as cracking can occur. Plasterboard manufacturers void any responsibility if easy tape is used on plasterboard ceilings. As the name "EASY TAPE" would indicate, this is the easiest tape of all to use. It is stuck to the plasterboard equally covering the joint before coating with base coat. Follow general points above.  Use your hand to start off the tape in the corner.  Once you have it started, use a 4 inch joint knife to prees the tape onto the join.  Pull the tape aloung the join and strech it slightly, while centering it over the join.  When you get to the opposite corner,lay your joint knife on the tape, slightly on an agle. Pull up on the tape roll and it will cut off very easy.  Apply the mud excessivly accoss the join along several widths of an 8 inch joint knife. Only apply mud between the recess join.  Keep the joint knife upright an slightly slanted upwards and clean off excess mud.  Only the reccess edge is filled with the first coat. Keeping the joint knife slightly angled up, stops the mud spreading out too wide.  The finished 1st coat is evenly fill along the join, without spreading it wide. Paper tapeNOTE: Paper tape is the strongest tape for joining plasterboard. Recessed JoinsApart from being the strongest plasterers tape, it is also the most difficult to use for the casual DIY. The main difficulties experienced are bubbles showing up after painting or tape showing through the plasterboard join requiring the join to be over filled to hide the tape. Bubbles forming under the tape is caused by either no base coat under the tape or the base coat has not been applied consistently and has dried out in parts before the tape has been embedded.  Fill the recess join, use an 8 inch joint knife to have better control.  Note that the recessed join is fully filled with no dry spots. Notice the angle of the joint knife, to stop the mud spreading too wide.  Start taping by laying a section of paper tape along the center of the join.  Strech the tape out along the join, and bed the tape, applying pressure to squeeze out excess mud.  Work your way along the join, streching out the tape as you go. Quite a bit of pressure need to be applied to work out the mud from under the tape.  Starting from the center, work back to each the end with quite a bit of pressure. This picture shows the build up that will occur. This needs to be worked out to each end. If you do this starting at one end working to the other, the build up becomes too excessive to work out.  Press the excess mud out from under the tape working from middle to end.  Apply a thin coat of mud over the taped in join. Note the angle of the joint knife to prevent spreading the mud too wide.  The finished 1st coat is evenly fill along the join. The tape is covered with a thin coat of mud. Butt JoinsPlasterboard butt joints have the added difficulty of not being recessed, so whatever tape and base coat applied is going to sit proud of the surrounding surface. To make a butt joint hidden requires a slightly different technique.  This shown the full coverage of base coat prior to bedding the tape. NOTE: there are no blank or dry spots.  The tape is layed out on the join. Then the excess plaster underneath is squeezed out. NOTE: Start in the center and work down,then the center and work up.  Working from the top down with an 8" broad knife fill over the top of the tape. Internal CornersInternal corners are best taped in after the plasterboard wall joins. Pre-fill and scape back any gaps over 5mm. As with all paper tape applications it is important to have a continuous "wet" layer of base coat before applying tape. Wet And Stick Paper tape This tape has an adhesive backing similar to that of a postage stamp. The tape is cut to length and run through water to wet the tape. The tape is placed in position and wiped in with a 3" joint knife. Once dry apply a thin coat of base coat over the tape.
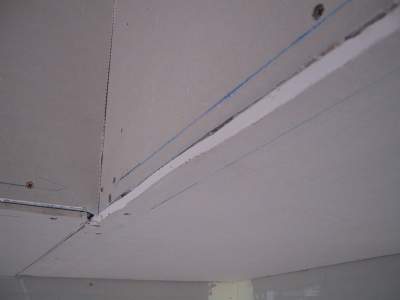
Wet and stick tape is also very useful to repair cracked plasterboard joins. It allows you to repair the join with the minimum amount of build up. Go straight to 2nd coat Back To TopRepairing Bubbles In Paper tapeQuite often bubbled paper tape will not show up until the job has been painted. It is a good idea to check the job for potential bubbles after the first coat of paint has been applied. The reason for this, is that the paper absorbs the moisture from the paint and swells. Because it is not laminated to the board the swelling causes it to lift away showing up as a bubble. Flexi Paper tapeFlexi Paper tape is a stiffened paper tape that can be bent to shape, Used for obtuse internals that a 135 degree metal angle won't fit. To straighten an obtuse angle, hold a chalk line from one end to the other, adjust the position of the line until you "even" up the line, and flick the line to give you a straight line to work to. If you only need to fill a short length, say 300mm to straighten the join, working along the length of the join may be ok, just follow the chalk line. For long runs that may need to be filled out up to 20mm, you will need to work away from the join. The best tool for this is a 12" joint knife or trowel. This is commonly known as "cross troweling". Move along the line filling away from the join, working from one side of the join only. This creates a new straight line to work to. Apply a second and top coat working along the join being guided by the chalk line. |