

How To Repair cracks in lath and plaster walls and ceilings
| BACK TO TIPS MENU | |
General information
| Working out if a lath and plaster wall or ceiling is worth fixing, will depend largely on the nature of the project and the amount of money, or work, you are prepared to put in.
|
| Ultimately the decision to repair or replace the lath and plaster, is up to you. I have provided below, examples of typical damage to lath and plaster, that I consider repairable, or not repairable. Where I consider an cracks in lath and plaster repairable, I have include the best methods of making the repairs below.
|
| Most old buildings with lath and plaster have some cracking. If you re-block your home, cracks in lath and plaster can become, "slabs of plaster" missing, or falling out. The first thing you need to do when assessing lath and plaster for repair, is to see if the wall is "DRUMMY". You do this by tapping on the surface, if it sounds firm it is most likely ok. Areas that sound hollow, or loose, are what is termed, 'DRUMMY". These are the areas like this in lath and plaster, need to be removed and replaced.
|
| If a lath and plaster wall can be repaired, it can save a lot of money in renovation cost. If a lath and plaster wall is repaired properly, there is no reason the repairs won't last for years. The biggest mistake I see being made, is people try to fill over cracks in lath and plaster, or just scrape the surface.
|
| A crack in lath and plaster or render, runs right through to the substrate behind it. Therefore you need to dig the crack out, all the way to the substrate. I recommend that the crack is scraped out to 15mm to 20mm wide. You can buy a triangular shaped scraping tool to do the job. Or my preferred method is a trimming knife. Just have plenty of blades on hand. With the trimming knife, I make a cut down each side of the crack in a v shape, (see diagram below). It is important to remove ALL the loose material. If the render feels like it wants to lift away, then cut it out back to where it becomes solid again.
|
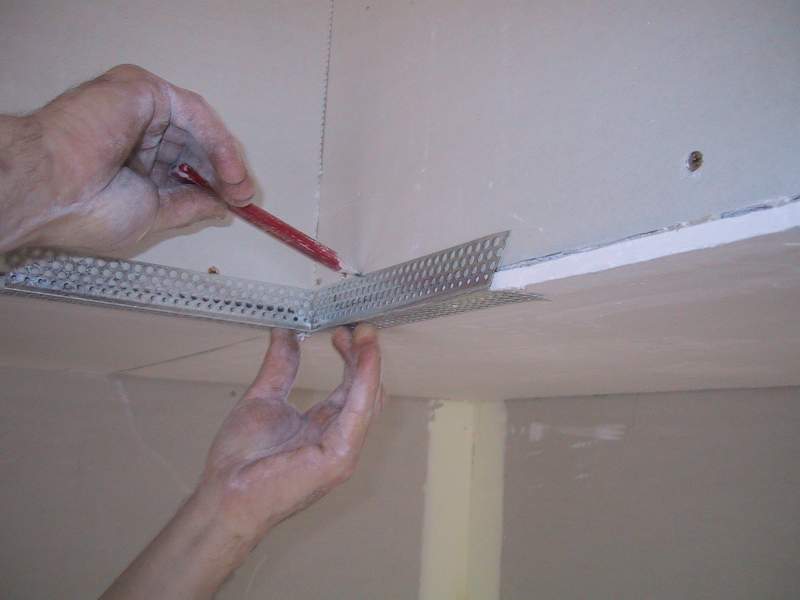
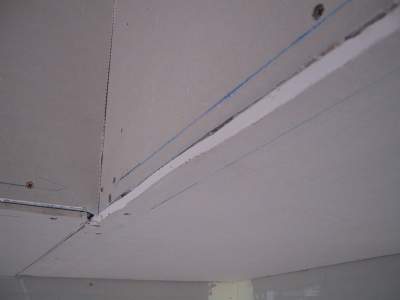
Replacing with Plasterboard, (required for area "a" type damage)

Back To Top —Repair Area "C" — Repair Area "B"
Repairing a Crack in lath and plaster walls or ceiling
  This is a typical non-structual crack in a lath and plaster, or plaster rendered masonary wall.  To repair a crack in a rendered or lath and plaster wall, the crack must be raked out, right back to the substrate.  This is how the crack will look when it is raked out to the bricks behind. The crack should be raked out in a V shape.  The raked out crack must be cleaned out of all loose dust, before filling.  Here is the crack ready to fill, notice I have wet the inside of the crack. Wetting down the crack is essential to allow a good bond with the plaster filler.  Fill along the crack in the same manner as shown in the bottom left picture Don't be concerned at the look, the key here is not to spread it too wide.  With the blade very upright, clean off all the excess plaster. Keep the blade hard against the surface and upright.  This is how the crack repair should look after the first coat. Don't be concerned, at this stage, if there are scratches or bulging out in the center. It is essential to scrape any bulging out, when the plaster has set but before the plaster has dried out.  The 2nd coat is applied the same way as the 1st. Again cut the excess back hard to the wall.  This is how the crack should appear,ready for top coat. Scrape back again before applying the top coat. If the crack is not fully filled another very thin coat will fix that. It is important here not to over fill, it should be flush. |
This Diagram, shows the filling and cutting out of a crack in lath and plaster walls or ceilings. The best product for filling cracks is 2 coats of cornice adhesive and a final coat of top coat. Prior to filling the crack, using a wet brush, brush out the loose debris and wet the interior of the crack. This is important to allow a good bond between the cornice adhesive and the render. Notice the 1st coat, (red), does not extend beyond the surrounding surface of the crack. The purpose of the fist coat is simply to fill the bulk of the crack. You don't have to be too concerned about what it looks like at this point. What is important, is that you scrape back any excess material, back to the surrounding surface. Scaping back should be done as soon as the plaster has set. This is when the plaster is the easiest to scrape. In most cases when you fill a crack the plaster will bulge out beyond the surrounding surface. So the scaping back process is crucial to getting a smooth finish Plaster is easier to control using a joint knife that is bigger than the job requires. But it takes a bit of practice to avoid spreading the material to wide. Using a wider joint knife you can fill the crack, holding the joint knife parallel to the crack in a dabbing motion. Then run down the crack at a right angle, cutting back hard to the surrounding surface. Apply a second and top coat as you would for filling a normal join see second coat or top coat. |
Back To Top —See Wall Diagram —Repair Area "A"
Repairing Damage in lath and plaster in area "c" above
 |
Filling a large hole can either be done with sand and cement as a preliminary filler and plastered over. However when you are patching a job and chunk of wall falls out you don't always have sand and cement on hand. This method shown here is using cornice adhesive. If you follow the mixing tips, using salt, in my tips on patching, this repair can be done with one mix. Apart from principles off stopping us as described above, the difference with a large hole, is, that you need to work from the outside in. The first coat is simply to take the bulk of the fill out. With the 1st coat, don't even attempt to make it level with the perimeter of the hole. The 2nd coat should form a "level" for the 3rd coat. To achieve this use a large joint knife, 12" knife is best. As indicated in the drawing using about 1/2 the width of the joint knife scrape back the 2nd coat level with the surrounding surface. This should leave a depression in the center that is filled and scraped level with the 3rd coat. The top coat can be applied to a flat surface just to take out minor imperfections and to feather the edge out beyond the hole. Following this method will repair the hole flat without over filling. |
Back To Top— See Wall Diagram— Repair Wall Cracks
Repairing damage to lath and plaster in area "B" above
 |
When repairing lath and plaster walls, it is not uncommon for large areas, such as area "A" above, to fall out. Fixing these areas is not a problem. There are several methods to fix an area like this. Using sand and cement as a preliminary filler and plastered over is probably the best method. Except that troweling sand and cement to an inexperienced person can be difficult. So I am going to explain how you can repair a hole this size using a much more "user friendly" material. The Same principals will apply if you choose to use sand and cement. Don't forget whenever repairing any lathen plaster or render surface, wet down the area to be repaired first. This allows a good bond between materials. We use a mixture of CORNICE ADHESIVE AND PERLITE. Perlite is not an easy product to buy, some garden suppliers stock perlite, you may have to shop around. A substitute for perlite is VERMICULITE. Both vermiculite and Perlite are also used as soil conditioners and in fire rating applications. Perlite is the better product to use.What perlite does is adds bulk to the mixture of cornice adhesive, while acting as a bonding agent. This allows you to fill very large depressions without the mix "falling out". The perlite also enables you to scrape back large areas to a smooth finish easily, using a level or other straight edge. Allowing you to apply a skim coat of straight cornice adhesive, then top coat to finish off as describe above. For this type of repair we would use approximately a ratio of cornice adhesive 60% perlite 40%. |
Back To Top —See Wall Diagram — Repair Wall Cracks— Repair area "C"